Tips for the One iPad Classroom, and a Free iPad Rules Download!
Have you heard the news? We've Moved to HeidiSongs.tv!
Our new website features an online video streaming service, updated blog posts at Heidisongs.blog, and a wealth of fresh resources designed to make learning even more fun and engaging.
You can also continue shopping for our educational products there and at our Teachers Pay Teachers store!
Head over to HeidiSongs.tv now and explore all the exciting new features.
See you there!
__________________________________________________________________________
Do you have an iPad in your classroom? Are you wondering how you can make use of it when there is only one device for all of your students to share? Well, never fear, I have tons of ideas for you right here, and a "Rules for the iPad" free download, too! And for those of you that may be new to my blog, this post focuses on using the iPad in the young children's classroom, such as Pre-K, Kindergarten, First Grade, etc.
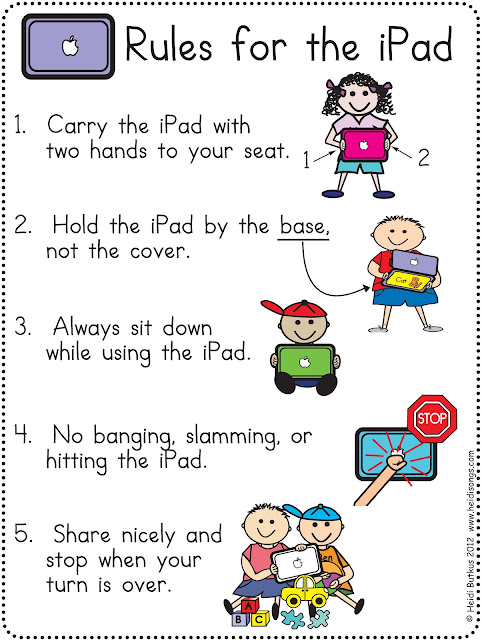
Before you get started using the iPad in any manner, make your expectations on how to use the device clear. Here are my rules for the iPad.
Rules for the iPad:
Carry the iPad with two hands.
Sit down while using the iPad.
Hold the iPad from the base, not the cover.
No banging, slamming, or hitting the iPad.
Share nicely and stop when your turn is over.
I made a poster for the rules with picture cues to help the children, and I am sharing it with you here today! Click here to download it in two sizes; one is 8.5 x 11″ and the other is poster size! It prints in four different sheets. Just glue them down on a poster board and laminate them.
Be sure that you physically demonstrate how to share the tablet. Then have some children in your class model that skill for the others. (Just telling them to share is not enough!) My favorite technique is to pick my two children that seem the least likely to share nicely to show the others how we share. First I show them, and then they model it for the class. This establishes that we all know that these children understand how to share the device. Therefore, if problems arise later, they can’t claim that they didn’t know.
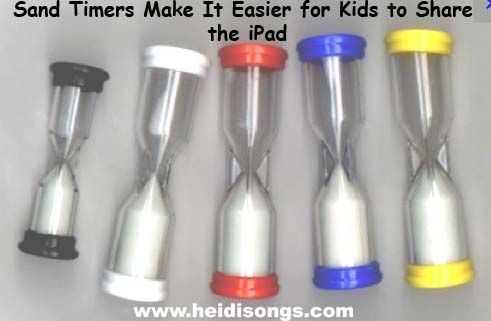
Sand timers make it easy for little ones to share. When the sand runs out, it is another child’s turn to “push the buttons.” BUT- when using a one minute sand timer, don’t let them change apps, or they will spend their whole 60 seconds choosing an app and opening it. Then the sand will run out before they have had a chance to play it, leading to frustration. That’s when they won’t give up their turn with the timer runs out!
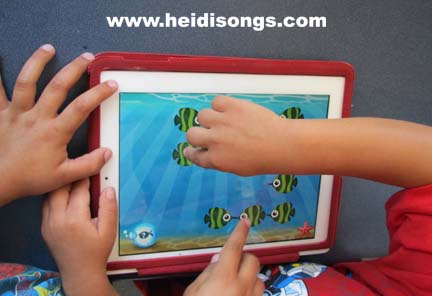
Sharing the iPad on the “Fish School” app by Duck Duck Moose.
A different way to share the iPad is to teach them to take turns pressing the “buttons.” First child one presses it, then child two; then child one, then child two, etc. That way, nobody has to wait for a very long time to play.
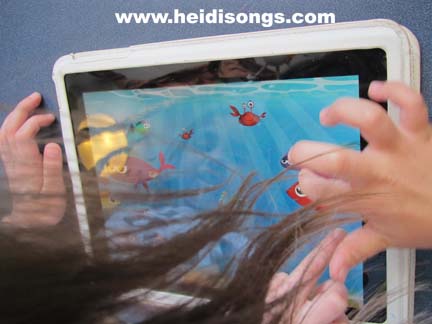
Here are some ways to use the iPad in a classroom where there is just ONE, and many children.
1. Use it as a motivational device.
* Tell children that when they master a certain skill, they will get a chance to play a favorite game on the iPad for a few minutes. The iPad can be a powerful motivator! I have had some children try very hard to learn how to write numbers once they realized that there was a reward that they really cared about waiting for them!
* Use it as a reward for a child with behavior issues. “Make a deal” with the child ahead of time that the child will meet a behavior goal in exchange for time on the iPad.
* Let a child that has finished his work quickly spend time on the iPad. You wouldn’t believe how quickly and beautifully my students were able to work last year with the lure of the iPad on the table. If the work looks rushed or sloppy, the child must fix it before getting a chance to play.
2. Use it for differentiating instruction.
* For small group instruction: Let an advanced child that has mastered a skill that you are working on in a small group work on the iPad instead of doing that small group lesson. Even Kindergartners and preschoolers can be taught to share the iPad without intervention, with a little practice!
* For large group instruction: Use it to occupy a child that is continually giving away answers during a whole group lesson. Send that advanced child to work on the iPad, and give him or her headphones. That will give the rest of the class some “think time” and a chance to answer your questions without the class “smarty pants” always giving it all away.
3. Give children one-on-one time on the iPad.
* Use volunteers to monitor this, or send children to work on it for five minutes at a time, setting a timer to help you remember to rotate them.
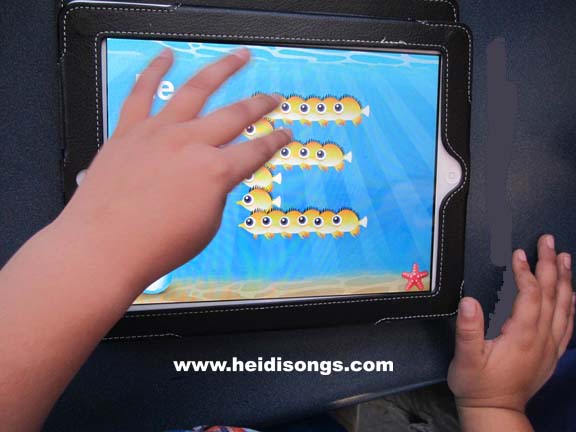
Don’t you just love those chubby little hands???? 
4. Use the iPad to give online quizzes, such as Accelerated Reader tests.
* Consider allowing those that get 100% on a test to take their next quiz on the iPad.
* Consider giving those that get 100% on a test the reward of alone time on the iPad.
5. Use the iPad for a Listening Center, setting up recordings of books in iTunes.
You will need a headphone adapter/splitter if you want the children to all share the one device. For more information on how to use iTunes for a listening center, click here.
6. Let an iPad app to form the basis for a small group lesson. Let the children take turns pressing the buttons.
Example: We used the app Park Math by Duck, Duck, Moose to show the children some problem solving questions in math. The app showed an animation of the problem and then the children chose one answer from the list. The children wrote their answers on white boards, and then one child pressed the button to find out who was right or wrong.
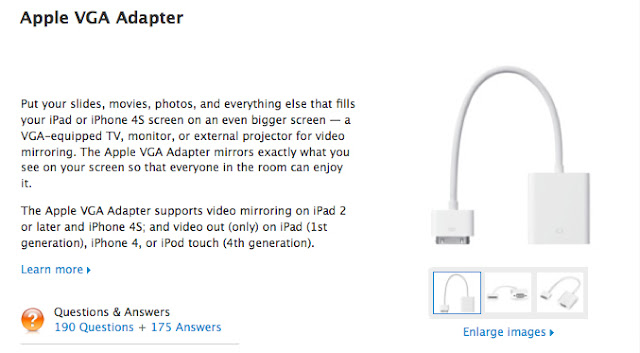
7. Pair your iPad with a projector and a VGA adapter ($29).
* Let the whole class watch you demonstrate an app or do a lesson based on an app.
* Web based lessons can also be done on the iPad. Consider using YouTube or SchoolTube video lessons. Google Earth is also a great resource.
8. Make a movie of a child reading.
* Children can read back their own writing assignments, or an assigned book. Kids often will work very hard to get a story “just right,” and may request to practice reading it again so that they can re-do their recording and “get it right.” This is even true of those movies that may NEVER be shown again! It’s a great motivator to increase fluency.
* Have older children make a movie of themselves reading a book for a younger class to use in a listening center.
9. Let one child at a time create his or her story on the iPad rather than on paper.
* Storybuddy 2 is a nice primary app for this purpose.
* Kids can also rotate through to do journal entries on the iPad.
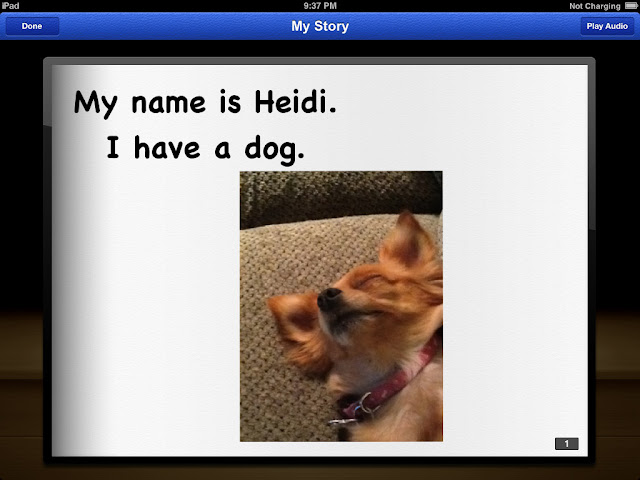
The Storybuddy 2 app allows you to add photos and text to make a simple story.
10. Rotate kids through using the iPad during playtime.
* Just keep a list so that everyone gets a turn. Make it a rule that the other kids cannot spend their playtime just sitting there watching, though! They need to go play.
11. Choose one child at a time to use the iPad as a dry erase board.
* Doodle Buddy is a nice app for this purpose.

12. Use the “Stick Pick” app to randomly choose students to respond to questions.
* This is just like picking a stick with a child’s name on it, but it’s on the iPad.
13. Use the iPad for classroom management and documentation.
* ClassDojo.com is a website that helps you document student behavior and participation easily. It can even generate behavior reports that you can send to parents. Use any mobile device to input data.
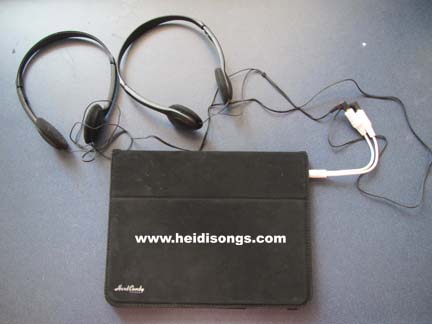
* A headphone splitter will allow two children to listen to one iPad.
14. Create a Collaborative Story.
* Many apps lend themselves to creating a story as a group. Sock Puppets is one of these. You choose puppets, backgrounds, settings, etc., and then make your puppets talk by talking into the microphone yourself. The puppets’ mouths sync themselves with your voice so that it looks like they are talking!
* Puppetpals and Toontastic are similar story telling apps.
* ComicStrip is an app that allows you to make a comic book out of your own photos by adding speech bubbles and other text boxes. Stories can be emailed, too.
For more info and models of instruction in the one iPad classroom, check out this link:
http://edtechdiva.wikispaces.com/The+One+iPad+Classroom
Here are some other posts on my favorite apps:
One on One iPad Program in Kindergarten
Seven Weeks Down: More Fun With Counting Creatures, iPad Apps, and More!
Teaching Kindergarten: What’s Working? Week #3
Teaching CVC Words: What To Do When They Are STILL Not Getting It
Hope this was helpful!
- Heidi :)

----------------------------------
Follow me! Did you enjoy this post? Do me a favor and share it with your friends! And follow this blog by signing up for my email updates here, or follow on Bloglovin', or follow me on TPT! I'm also on Pinterest, Facebook, Twitter, Instagram, Google+ and YouTube, too! Don't forget to sign up for our email newsletter for special deals and promo codes that you won't find out about anywhere else.
Before you get started using the iPad in any manner, make your expectations on how to use the device clear. Here are my rules for the iPad.
Rules for the iPad:
Carry the iPad with two hands.
Sit down while using the iPad.
Hold the iPad from the base, not the cover.
No banging, slamming, or hitting the iPad.
Share nicely and stop when your turn is over.
I made a poster for the rules with picture cues to help the children, and I am sharing it with you here today! Click here to download it in two sizes; one is 8.5 x 11″ and the other is poster size! It prints in four different sheets. Just glue them down on a poster board and laminate them.

Be sure that you physically demonstrate how to share the tablet. Then have some children in your class model that skill for the others. (Just telling them to share is not enough!) My favorite technique is to pick my two children that seem the least likely to share nicely to show the others how we share. First I show them, and then they model it for the class. This establishes that we all know that these children understand how to share the device. Therefore, if problems arise later, they can’t claim that they didn’t know.

Sand timers make it easy for little ones to share. When the sand runs out, it is another child’s turn to “push the buttons.” BUT- when using a one minute sand timer, don’t let them change apps, or they will spend their whole 60 seconds choosing an app and opening it. Then the sand will run out before they have had a chance to play it, leading to frustration. That’s when they won’t give up their turn with the timer runs out!

A different way to share the iPad is to teach them to take turns pressing the “buttons.” First child one presses it, then child two; then child one, then child two, etc. That way, nobody has to wait for a very long time to play.


Here are some ways to use the iPad in a classroom where there is just ONE, and many children.
1. Use it as a motivational device.
* Tell children that when they master a certain skill, they will get a chance to play a favorite game on the iPad for a few minutes. The iPad can be a powerful motivator! I have had some children try very hard to learn how to write numbers once they realized that there was a reward that they really cared about waiting for them!
* Use it as a reward for a child with behavior issues. “Make a deal” with the child ahead of time that the child will meet a behavior goal in exchange for time on the iPad.
* Let a child that has finished his work quickly spend time on the iPad. You wouldn’t believe how quickly and beautifully my students were able to work last year with the lure of the iPad on the table. If the work looks rushed or sloppy, the child must fix it before getting a chance to play.
2. Use it for differentiating instruction.
* For small group instruction: Let an advanced child that has mastered a skill that you are working on in a small group work on the iPad instead of doing that small group lesson. Even Kindergartners and preschoolers can be taught to share the iPad without intervention, with a little practice!
* For large group instruction: Use it to occupy a child that is continually giving away answers during a whole group lesson. Send that advanced child to work on the iPad, and give him or her headphones. That will give the rest of the class some “think time” and a chance to answer your questions without the class “smarty pants” always giving it all away.
3. Give children one-on-one time on the iPad.
* Use volunteers to monitor this, or send children to work on it for five minutes at a time, setting a timer to help you remember to rotate them.


4. Use the iPad to give online quizzes, such as Accelerated Reader tests.
* Consider allowing those that get 100% on a test to take their next quiz on the iPad.
* Consider giving those that get 100% on a test the reward of alone time on the iPad.
5. Use the iPad for a Listening Center, setting up recordings of books in iTunes.
You will need a headphone adapter/splitter if you want the children to all share the one device. For more information on how to use iTunes for a listening center, click here.
6. Let an iPad app to form the basis for a small group lesson. Let the children take turns pressing the buttons.
Example: We used the app Park Math by Duck, Duck, Moose to show the children some problem solving questions in math. The app showed an animation of the problem and then the children chose one answer from the list. The children wrote their answers on white boards, and then one child pressed the button to find out who was right or wrong.
7. Pair your iPad with a projector and a VGA adapter ($29).
* Let the whole class watch you demonstrate an app or do a lesson based on an app.
* Web based lessons can also be done on the iPad. Consider using YouTube or SchoolTube video lessons. Google Earth is also a great resource.

8. Make a movie of a child reading.
* Children can read back their own writing assignments, or an assigned book. Kids often will work very hard to get a story “just right,” and may request to practice reading it again so that they can re-do their recording and “get it right.” This is even true of those movies that may NEVER be shown again! It’s a great motivator to increase fluency.
* Have older children make a movie of themselves reading a book for a younger class to use in a listening center.
9. Let one child at a time create his or her story on the iPad rather than on paper.
* Storybuddy 2 is a nice primary app for this purpose.
* Kids can also rotate through to do journal entries on the iPad.

10. Rotate kids through using the iPad during playtime.
* Just keep a list so that everyone gets a turn. Make it a rule that the other kids cannot spend their playtime just sitting there watching, though! They need to go play.
11. Choose one child at a time to use the iPad as a dry erase board.
* Doodle Buddy is a nice app for this purpose.

12. Use the “Stick Pick” app to randomly choose students to respond to questions.
* This is just like picking a stick with a child’s name on it, but it’s on the iPad.
13. Use the iPad for classroom management and documentation.
* ClassDojo.com is a website that helps you document student behavior and participation easily. It can even generate behavior reports that you can send to parents. Use any mobile device to input data.

* A headphone splitter will allow two children to listen to one iPad.
14. Create a Collaborative Story.
* Many apps lend themselves to creating a story as a group. Sock Puppets is one of these. You choose puppets, backgrounds, settings, etc., and then make your puppets talk by talking into the microphone yourself. The puppets’ mouths sync themselves with your voice so that it looks like they are talking!
* Puppetpals and Toontastic are similar story telling apps.
* ComicStrip is an app that allows you to make a comic book out of your own photos by adding speech bubbles and other text boxes. Stories can be emailed, too.
For more info and models of instruction in the one iPad classroom, check out this link:
http://edtechdiva.wikispaces.com/The+One+iPad+Classroom
Here are some other posts on my favorite apps:
One on One iPad Program in Kindergarten
Seven Weeks Down: More Fun With Counting Creatures, iPad Apps, and More!
Teaching Kindergarten: What’s Working? Week #3
Teaching CVC Words: What To Do When They Are STILL Not Getting It
Hope this was helpful!
- Heidi :)

----------------------------------
Follow me! Did you enjoy this post? Do me a favor and share it with your friends! And follow this blog by signing up for my email updates here, or follow on Bloglovin', or follow me on TPT! I'm also on Pinterest, Facebook, Twitter, Instagram, Google+ and YouTube, too! Don't forget to sign up for our email newsletter for special deals and promo codes that you won't find out about anywhere else.


