How I Got All My Kids to Learn 100% of the Letters & Sounds
Have you heard the news? We've Moved to HeidiSongs.tv!
Our new website features an online video streaming service, updated blog posts at Heidisongs.blog, and a wealth of fresh resources designed to make learning even more fun and engaging.
You can also continue shopping for our educational products there and at our Teachers Pay Teachers store!
Head over to HeidiSongs.tv now and explore all the exciting new features.
See you there!
__________________________________________________________________________
This year, all of my students in my half day Transitional Kindergarten (TK) class learned every single letter and sound! In this post, I will tell you my weekly routines for teaching and reviewing the alphabet and letter sounds that led to 100% mastery for every single student in my class- even the children that struggled to learn! And we only had three hours per day total for every subject, including playtime and recess!

Considering how much we accomplished in so little time, I felt that these routines would important to share, since there are so many demands placed on teachers everywhere. Our Transitional Kindergarten students are just four years old when they start school, and must turn five sometime between September 1 and December 2 of the school year in order to qualify for the TK program. They will all start Kindergarten in the fall, totally ready to learn!

Note: You may notice that I have included several ESGI charts in this post. You can certainly follow the routines in this post without using ESGI! I decided to include the graphs because they show the progress of my class very clearly. I am an affiliate of ESGI, but my opinions are definitely my own. :)
But before we get started, let’s address this question first, because I get asked this ALL.THE.TIME.
In What Order Do I Introduce the Letters?
I used to go in order of the alphabet, as you will see if you look at my Kindergarten Pacing Guide here. These days, I begin with whatever letters my district’s adopted language arts series recommends, and that is usually A, M, or S. But actually, I do not think that the sequence of letters that you focus on weekly makes a great deal of difference to the outcome, as long as you REVIEW the ENTIRE ALPHABET and SOUNDS DAILY ANYWAY! Check item one below.
For TK, I follow the sequence of my district’s adopted curriculum (Benchmark Ready to Advance) for a couple of months or until my class starts to catch on. (See my TK Pacing Guide Here.) I test them using ESGI, and then see what the class knows. After that point, I start to adjust the order depending on the needs of my class. I check the item analysis graph (see below) and see what they need the most and focus on those letters next! I am fortunate that neither my principals nor my district administrators are micro-managers. They allow us to do what we consider to be best for our students! (Isn’t that just the BEST!)

Please note that this graph is from my students’ progress at the end of January. From this graph, I can tell which are my most known and least known letters. I can also see that my students are probably mixing up the lower case n and u, so that is something we began working on. (See “Compare and Contrast the Letters…” item four below.) And so in summary, I start with the easiest letters, and then move on the letters that my class needs to work on the most.
Daily Routines
1. Zoo Phonics Sounds and Letter Names Drill
Fall: I introduce the sounds will Zoo Phonics cards and have been using them since 1992! They have worked for me EVERY. SINGLE. YEAR. I do mix up the letters so that we are not always going from A-Z. I also put a plain letter on the back of my cards. After the children seem to know the letter sounds with the cards (after about a month,) I start asking them the sound, and then flipping the card over to ask them the letter NAME. First I say, “Sound?” Then I flip it over and say, “Name?”

Winter: After the first trimester or so, start on the BACK of the letters and ask them the letter name first, and THEN the sound! I also think it is VERY important to start doing the Zoo Phonics drill with their CAPITAL LETTERS! This is something I had never done before in Kindergarten, only this year in TK. I’m not sure why I neglected it, and I regret now that I did!

When I tested my kids on the sounds using the capital letters, and I was just SHOCKED at how difficult this was for many of them! (Just look at the graph below from January to see just how many of my students did NOT know the letter sounds for the capital letters!) They really need to know that the letter sounds apply to both upper and lower case letters, so I recommend that you start throwing both of them in. Go back and forth from letter to sound and sound to letter, and from capital to lower case, and lower case to capital.

Spring: Start telling them the SOUNDS, and asking them to tell you the letter name! This might be a little harder than you think! It’s very important that they make the full connection, all the way back to knowing which sound goes with which letter. Otherwise, when you ask them to sound out a word and write it, they will get STUCK. I noticed this when I asked my students to tell me all of the sounds that they heard in a CVC (Consonant Vowel Consonant) word, and then write it. Only my top two groups could do this easily. The rest of them could tell me the sounds that they heard, but couldn’t necessarily identify the letters that went with each sound. Of course, after that, in small groups they need to work on writing those letters. (It works best in small groups so that the slower writers can have the time that they need to be successful, without the pressure of comparing themselves to the quicker writers.)

2. In Addition to DAILY Drill on ALL Letters, Focus on One Letter Per Week
People often ask if I do Letter of the Week. I always have to give a qualified “yes,” but I still review all of the letters every day. My letter of the week is on my Focus Wall, and we review it daily whole group by saying the letter, its sound, and by repeating the names of the flashcards that begin with that sound.

3. Sing and Dance to the Alphabet Song from HeidiSongs Letters and Sounds Video Collection
Each day, we sang the letters and sounds song for our letter of the week, especially in the fall months! It's so easy with our HeidiSongs.tv Video Streaming Site! I even let parents know about the $9.99/year rental so they can sign up and practice at home!
After the first trimester, we switched to singing the Sight Word Songs and the Word Family Songs, for the most part! I definitely sing the songs for the letters that are a bit tricky for them, such as the G, J, Q, U, W, etc. I would have done both the alphabet songs and the sight word songs, but there just isn’t enough time in a three hour, half day program.
For kids that don’t yet know every letter, the great thing about playing sight word songs is that they keep repeating how to SPELL the the words, saying the letter names over and over as the letters are highlighted on screen. In addition, I ALWAYS have the kids say the word with me and spell it aloud as I point to the word on the screen. All of this is great for the kids that do not yet know all of the letters! It puts the letters in context, mixes them up, and gives them a purpose for learning them. Some children may not care at all about the letters L or K, but if their favorite song is the “Like” song, they’ll learn them!
4. Compare and Contrast the Letters and Sounds That They Are Mixing Up
Very often, I can tell which letters and sounds the class is confusing just by paying attention to their responses during our Zoo Phonics letter drill. For example, sometimes I heard the sound of the Y when I asked them for the sound of the U. Sometimes, I pay attention to just my lower achievers at this time, watching their mouths so I can try to figure out what those children are saying. Do they have it? If I can’t tell, then I will ask the children to respond by groups only, selecting the trickiest, most “suspect” letters to focus on. If my low ones are hesitant or responding incorrectly, then I know what to work on without spending additional time assessing.

(The flashcards are from the ABC Volume 2 workbook! I keep them ready to go in baskets on the marker tray on my dry erase board.)
For quick, additional practice, I write a few of those easily confused (similar looking) letters and sounds on the white board above my Letter of the Week Pocket Chart. After reciting the letter of the week, its sound, and key words, then I point to the other letters and ask, “Letter? Sound?” I go back and forth, pointing to those letters, and try to help them think of something that might help them remember. For example, the letter U song says, “It’s a smily, smily, letter U!” So I remind them that if the letter is smiling at YOU, it’s a U. If not, it’s a lower case n. We sing a VERY short snippet from the U song- just that one line! “It’s a smily, smily, letter U, letter U, letter U!” Or, this one has a line here, but that was does not. Or, “the lower case b has a belly, but d has a diaper! And I can find the B with the ball on the wall right there if I forget!” Sometimes, I ask a child to tell me how I can tell the difference between them. I stick with those tricky letters until it appears that everyone has them. And then of course, I pull them and retest them when I get a chance.
I like to track my struggling students’ progress closely as much as I can, and I use ESGI for this purpose because it is quick and easy! I simply pull it up online, call over a student and ask him or her a few letters, and then I can see what is happening by looking at the results. I often use their item analysis graphs to tell me which letter should be the next letter of the week.
5. Phonemic Awareness Drills- All Year Long!
I use the Michael Heggerty Phonemic Awareness Curriculum for this. In TK, we use the Pre-K level book. It is EXCELLENT for helping the kids practice beginning, ending, and middle sounds daily, plus rhyming words, sound blending, sound substitution, etc. Once I got my kids into a routine, it took us less than ten minutes per day, and it was EASY! The book is $79.95, and comes printed with the whole year’s lessons in it. For more information on this, please see my blog post here.
Small Group Weekly Routines
1. Once a Week in the Fall Until Mid January: Letter Formation Lesson in Small Groups Using Handwriting Without Tears Sticks
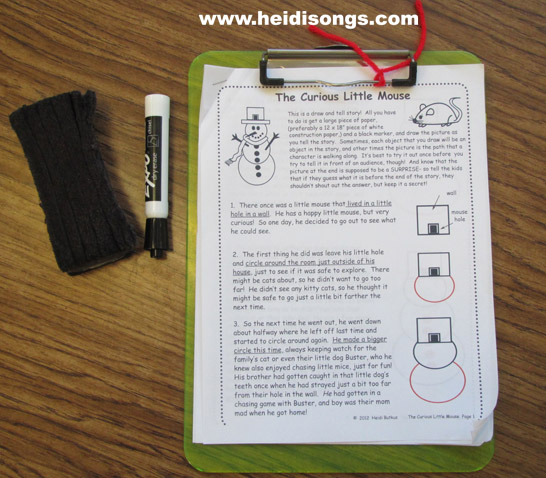
I have had a set of Handwriting Without Tears sticks that I have been using in small groups for about 20 years! I find this set extremely helpful to my little ones, especially in the fall when many are having their first experiences with letters. You can see a short video of this lesson below, and a photo of the materials I use.

You can get more details on this lesson on this blog post here: How to Teach the Alphabet! Check the section called, “Once a Week in Small Groups: Do a Letter WRITING Lesson!”
At the end of that lesson, I had them do the workbook page in the Handwriting Without Tears (HWT) book. However, after the first trimester, both me and my TK teammate decided to forgo the HWT workbook pages for some alphabet pages that also included pictures of words that began with that letter sound, as well as some non-examples! It just made more sense to have them practice both at once, because the children were getting faster at writing their letters, and this saved us time. We were using the Benchmark worksheets that came with our language arts series, but I’m planning on creating some of additional worksheets with our existing alphabet artwork so that the pictures will already be familiar to them from our focus wall. Then, they will already know what the pictures represent when they see them and won’t need to ask, saving us even more time.
2. Once a Week in the Fall: Sound Sort with Flash Cards or Manipulatives
After I have introduced two or three letters, I begin doing sound sorts with my students, usually using flash cards with pictures or photographs. If I have introduced the letters A, S, and M, then we sort only those beginning sound pictures into baskets marked with the letters. If they are having trouble identifying the sound, I ask the children to look at my lips and say the sound with me. Sometimes looking at the their own lips in a mirror also helps. If your kids are having trouble with this, check out this blog post, “Sound Discrimination: What to Do When Kids Cannot Identify Beginning Sounds.”

3. Once a Week in the Fall, (only for as long as needed): Sort Plastic Letters by Letter to Develop Visual Perception
For very young or immature students, or those with little experience with print, children may need to touch and feel the letters to figure out how each one looks as opposed to the other. We did this first with the capitals and then with the lower case letters, and then with the numbers. Since this was my first time teaching TK, my entire class was four years in August when we started! I had never experienced this before, and their nearly universal inability to visually discriminate between the letters really took me by surprise. Thankfully, my teammate Jeff Pang had experience with this and knew that they needed to sort real plastic or foam letters to help them figure it out. It really helped a great deal!

You will know when they have it by watching to see how quickly they are able to match the letters. Many of my kids had such a difficult time with this that we had to actually TAPE one identical letter down on the poster board for them to match the others to! And we were NOT even trying to get them to match a capital to a lower case letter! They just had to match a capital to a capital, or a lower case letter to a lower case letter.
Incidentally, I noticed that my learners that struggled the most really did not learn the first letters that I introduced until their visual perception improved, and until they really got used to being in school. So the Letter of the Week lessons that I gave during the first six weeks of school or so really didn’t reach them at all until later, and I had to circle back and reteach them these letters. It was frustrating for me, because most of the class already knew these letters. But… no child left behind, right? So once most of my class knew the majority of the other letters, I put these basic letters back up as “Letter of the Week” on my focus wall and made SURE that my little sweethearts were paying attention when I went over them each day, because I knew that by spring time, they were indeed ready to learn.
4. Once a Week Beginning in Mid January: Practice Writing the Alphabet from Memory
Beginning in Mid January, we start teaching our students to write the letters from memory. In fact, our district requires even our TK students to learn to write the alphabet on lined paper, and it is on their second trimester report card! I was surprised to see that it was required, but in my opinion, it is really the only “hard” item that we teach the TKs, so I’m grateful for that! (And besides- most of them actually GOT IT! Find out how we did it here!)

Our slowest working students are usually able to practice five or six letters per 12 minute lesson. The faster workers are able to complete about half of the alphabet in one sitting. So, we save the papers and do half of the alphabet one week, and the rest the next week, etc. We did this every week until the end of the second trimester, as we prepared them for their alphabet writing test. Third trimester: we did this about every other week to make sure that they did not forget! By the end of the year, most can write the whole alphabet, both upper and lower case, from memory, in about 10-15 minutes on lined paper.
5. Once a week from February Until the End of the Year: Apply the Skills!
A skill is only partially learned until it is applied! And this is SO true of the alphabet and sounds! The children should be able to write any letter that you say, on command. They should be able to say the sounds they hear in a word and write them down, especially simple three letter, CVC words (Consonant Vowel Consonant words.) You will likely also notice that several of the children don’t really “know” some of the sounds, especially the vowel sounds when they are going from the sound to the letter. For example, if they say, “/s/ /u/ /n/“, they might not recognize the middle sound as the U sound. And so then you’ll need to go back and review it, going from the sound to the letter.
I also have my kids practice singing the sight word songs and then writing the letters for the words that they just sang. This helps a great deal in their writing, because they start to understand that those songs really do serve a purpose! The songs tell us how to write a word! You would be surprised how many children don’t realize that, LOL!
I have my kids write the words while the sight words songs play, and then let the word disappear and have them try to remember it and write it from memory. Once they figure out that they can use the song to help themselves remember, they are off and running! This also boosts their knowledge of the alphabet as they USE what they have learned!
I hope that this was helpful to you! Happy teaching!
-Heidi

----------------------------------
Follow me! Did you enjoy this post? Do me a favor and share it with your friends! And follow this blog by signing up for my email updates here, or follow on Bloglovin', or follow me on TPT! I'm also on Pinterest, Facebook, Twitter, Instagram, Google+ and YouTube, too! Don't forget to sign up for our email newsletter for special deals and promo codes that you won't find out about anywhere else.

Considering how much we accomplished in so little time, I felt that these routines would important to share, since there are so many demands placed on teachers everywhere. Our Transitional Kindergarten students are just four years old when they start school, and must turn five sometime between September 1 and December 2 of the school year in order to qualify for the TK program. They will all start Kindergarten in the fall, totally ready to learn!

Note: You may notice that I have included several ESGI charts in this post. You can certainly follow the routines in this post without using ESGI! I decided to include the graphs because they show the progress of my class very clearly. I am an affiliate of ESGI, but my opinions are definitely my own. :)
But before we get started, let’s address this question first, because I get asked this ALL.THE.TIME.
In What Order Do I Introduce the Letters?
I used to go in order of the alphabet, as you will see if you look at my Kindergarten Pacing Guide here. These days, I begin with whatever letters my district’s adopted language arts series recommends, and that is usually A, M, or S. But actually, I do not think that the sequence of letters that you focus on weekly makes a great deal of difference to the outcome, as long as you REVIEW the ENTIRE ALPHABET and SOUNDS DAILY ANYWAY! Check item one below.
For TK, I follow the sequence of my district’s adopted curriculum (Benchmark Ready to Advance) for a couple of months or until my class starts to catch on. (See my TK Pacing Guide Here.) I test them using ESGI, and then see what the class knows. After that point, I start to adjust the order depending on the needs of my class. I check the item analysis graph (see below) and see what they need the most and focus on those letters next! I am fortunate that neither my principals nor my district administrators are micro-managers. They allow us to do what we consider to be best for our students! (Isn’t that just the BEST!)

Please note that this graph is from my students’ progress at the end of January. From this graph, I can tell which are my most known and least known letters. I can also see that my students are probably mixing up the lower case n and u, so that is something we began working on. (See “Compare and Contrast the Letters…” item four below.) And so in summary, I start with the easiest letters, and then move on the letters that my class needs to work on the most.
Daily Routines
1. Zoo Phonics Sounds and Letter Names Drill
Fall: I introduce the sounds will Zoo Phonics cards and have been using them since 1992! They have worked for me EVERY. SINGLE. YEAR. I do mix up the letters so that we are not always going from A-Z. I also put a plain letter on the back of my cards. After the children seem to know the letter sounds with the cards (after about a month,) I start asking them the sound, and then flipping the card over to ask them the letter NAME. First I say, “Sound?” Then I flip it over and say, “Name?”

Winter: After the first trimester or so, start on the BACK of the letters and ask them the letter name first, and THEN the sound! I also think it is VERY important to start doing the Zoo Phonics drill with their CAPITAL LETTERS! This is something I had never done before in Kindergarten, only this year in TK. I’m not sure why I neglected it, and I regret now that I did!

When I tested my kids on the sounds using the capital letters, and I was just SHOCKED at how difficult this was for many of them! (Just look at the graph below from January to see just how many of my students did NOT know the letter sounds for the capital letters!) They really need to know that the letter sounds apply to both upper and lower case letters, so I recommend that you start throwing both of them in. Go back and forth from letter to sound and sound to letter, and from capital to lower case, and lower case to capital.

Spring: Start telling them the SOUNDS, and asking them to tell you the letter name! This might be a little harder than you think! It’s very important that they make the full connection, all the way back to knowing which sound goes with which letter. Otherwise, when you ask them to sound out a word and write it, they will get STUCK. I noticed this when I asked my students to tell me all of the sounds that they heard in a CVC (Consonant Vowel Consonant) word, and then write it. Only my top two groups could do this easily. The rest of them could tell me the sounds that they heard, but couldn’t necessarily identify the letters that went with each sound. Of course, after that, in small groups they need to work on writing those letters. (It works best in small groups so that the slower writers can have the time that they need to be successful, without the pressure of comparing themselves to the quicker writers.)

2. In Addition to DAILY Drill on ALL Letters, Focus on One Letter Per Week
People often ask if I do Letter of the Week. I always have to give a qualified “yes,” but I still review all of the letters every day. My letter of the week is on my Focus Wall, and we review it daily whole group by saying the letter, its sound, and by repeating the names of the flashcards that begin with that sound.

3. Sing and Dance to the Alphabet Song from HeidiSongs Letters and Sounds Video Collection
Each day, we sang the letters and sounds song for our letter of the week, especially in the fall months! It's so easy with our HeidiSongs.tv Video Streaming Site! I even let parents know about the $9.99/year rental so they can sign up and practice at home!
After the first trimester, we switched to singing the Sight Word Songs and the Word Family Songs, for the most part! I definitely sing the songs for the letters that are a bit tricky for them, such as the G, J, Q, U, W, etc. I would have done both the alphabet songs and the sight word songs, but there just isn’t enough time in a three hour, half day program.
For kids that don’t yet know every letter, the great thing about playing sight word songs is that they keep repeating how to SPELL the the words, saying the letter names over and over as the letters are highlighted on screen. In addition, I ALWAYS have the kids say the word with me and spell it aloud as I point to the word on the screen. All of this is great for the kids that do not yet know all of the letters! It puts the letters in context, mixes them up, and gives them a purpose for learning them. Some children may not care at all about the letters L or K, but if their favorite song is the “Like” song, they’ll learn them!
4. Compare and Contrast the Letters and Sounds That They Are Mixing Up
Very often, I can tell which letters and sounds the class is confusing just by paying attention to their responses during our Zoo Phonics letter drill. For example, sometimes I heard the sound of the Y when I asked them for the sound of the U. Sometimes, I pay attention to just my lower achievers at this time, watching their mouths so I can try to figure out what those children are saying. Do they have it? If I can’t tell, then I will ask the children to respond by groups only, selecting the trickiest, most “suspect” letters to focus on. If my low ones are hesitant or responding incorrectly, then I know what to work on without spending additional time assessing.

For quick, additional practice, I write a few of those easily confused (similar looking) letters and sounds on the white board above my Letter of the Week Pocket Chart. After reciting the letter of the week, its sound, and key words, then I point to the other letters and ask, “Letter? Sound?” I go back and forth, pointing to those letters, and try to help them think of something that might help them remember. For example, the letter U song says, “It’s a smily, smily, letter U!” So I remind them that if the letter is smiling at YOU, it’s a U. If not, it’s a lower case n. We sing a VERY short snippet from the U song- just that one line! “It’s a smily, smily, letter U, letter U, letter U!” Or, this one has a line here, but that was does not. Or, “the lower case b has a belly, but d has a diaper! And I can find the B with the ball on the wall right there if I forget!” Sometimes, I ask a child to tell me how I can tell the difference between them. I stick with those tricky letters until it appears that everyone has them. And then of course, I pull them and retest them when I get a chance.
I like to track my struggling students’ progress closely as much as I can, and I use ESGI for this purpose because it is quick and easy! I simply pull it up online, call over a student and ask him or her a few letters, and then I can see what is happening by looking at the results. I often use their item analysis graphs to tell me which letter should be the next letter of the week.
5. Phonemic Awareness Drills- All Year Long!
I use the Michael Heggerty Phonemic Awareness Curriculum for this. In TK, we use the Pre-K level book. It is EXCELLENT for helping the kids practice beginning, ending, and middle sounds daily, plus rhyming words, sound blending, sound substitution, etc. Once I got my kids into a routine, it took us less than ten minutes per day, and it was EASY! The book is $79.95, and comes printed with the whole year’s lessons in it. For more information on this, please see my blog post here.
Small Group Weekly Routines
1. Once a Week in the Fall Until Mid January: Letter Formation Lesson in Small Groups Using Handwriting Without Tears Sticks
I have had a set of Handwriting Without Tears sticks that I have been using in small groups for about 20 years! I find this set extremely helpful to my little ones, especially in the fall when many are having their first experiences with letters. You can see a short video of this lesson below, and a photo of the materials I use.

You can get more details on this lesson on this blog post here: How to Teach the Alphabet! Check the section called, “Once a Week in Small Groups: Do a Letter WRITING Lesson!”
At the end of that lesson, I had them do the workbook page in the Handwriting Without Tears (HWT) book. However, after the first trimester, both me and my TK teammate decided to forgo the HWT workbook pages for some alphabet pages that also included pictures of words that began with that letter sound, as well as some non-examples! It just made more sense to have them practice both at once, because the children were getting faster at writing their letters, and this saved us time. We were using the Benchmark worksheets that came with our language arts series, but I’m planning on creating some of additional worksheets with our existing alphabet artwork so that the pictures will already be familiar to them from our focus wall. Then, they will already know what the pictures represent when they see them and won’t need to ask, saving us even more time.
2. Once a Week in the Fall: Sound Sort with Flash Cards or Manipulatives
After I have introduced two or three letters, I begin doing sound sorts with my students, usually using flash cards with pictures or photographs. If I have introduced the letters A, S, and M, then we sort only those beginning sound pictures into baskets marked with the letters. If they are having trouble identifying the sound, I ask the children to look at my lips and say the sound with me. Sometimes looking at the their own lips in a mirror also helps. If your kids are having trouble with this, check out this blog post, “Sound Discrimination: What to Do When Kids Cannot Identify Beginning Sounds.”

3. Once a Week in the Fall, (only for as long as needed): Sort Plastic Letters by Letter to Develop Visual Perception
For very young or immature students, or those with little experience with print, children may need to touch and feel the letters to figure out how each one looks as opposed to the other. We did this first with the capitals and then with the lower case letters, and then with the numbers. Since this was my first time teaching TK, my entire class was four years in August when we started! I had never experienced this before, and their nearly universal inability to visually discriminate between the letters really took me by surprise. Thankfully, my teammate Jeff Pang had experience with this and knew that they needed to sort real plastic or foam letters to help them figure it out. It really helped a great deal!

You will know when they have it by watching to see how quickly they are able to match the letters. Many of my kids had such a difficult time with this that we had to actually TAPE one identical letter down on the poster board for them to match the others to! And we were NOT even trying to get them to match a capital to a lower case letter! They just had to match a capital to a capital, or a lower case letter to a lower case letter.
Incidentally, I noticed that my learners that struggled the most really did not learn the first letters that I introduced until their visual perception improved, and until they really got used to being in school. So the Letter of the Week lessons that I gave during the first six weeks of school or so really didn’t reach them at all until later, and I had to circle back and reteach them these letters. It was frustrating for me, because most of the class already knew these letters. But… no child left behind, right? So once most of my class knew the majority of the other letters, I put these basic letters back up as “Letter of the Week” on my focus wall and made SURE that my little sweethearts were paying attention when I went over them each day, because I knew that by spring time, they were indeed ready to learn.
4. Once a Week Beginning in Mid January: Practice Writing the Alphabet from Memory
Beginning in Mid January, we start teaching our students to write the letters from memory. In fact, our district requires even our TK students to learn to write the alphabet on lined paper, and it is on their second trimester report card! I was surprised to see that it was required, but in my opinion, it is really the only “hard” item that we teach the TKs, so I’m grateful for that! (And besides- most of them actually GOT IT! Find out how we did it here!)

Our slowest working students are usually able to practice five or six letters per 12 minute lesson. The faster workers are able to complete about half of the alphabet in one sitting. So, we save the papers and do half of the alphabet one week, and the rest the next week, etc. We did this every week until the end of the second trimester, as we prepared them for their alphabet writing test. Third trimester: we did this about every other week to make sure that they did not forget! By the end of the year, most can write the whole alphabet, both upper and lower case, from memory, in about 10-15 minutes on lined paper.
5. Once a week from February Until the End of the Year: Apply the Skills!
A skill is only partially learned until it is applied! And this is SO true of the alphabet and sounds! The children should be able to write any letter that you say, on command. They should be able to say the sounds they hear in a word and write them down, especially simple three letter, CVC words (Consonant Vowel Consonant words.) You will likely also notice that several of the children don’t really “know” some of the sounds, especially the vowel sounds when they are going from the sound to the letter. For example, if they say, “/s/ /u/ /n/“, they might not recognize the middle sound as the U sound. And so then you’ll need to go back and review it, going from the sound to the letter.
I also have my kids practice singing the sight word songs and then writing the letters for the words that they just sang. This helps a great deal in their writing, because they start to understand that those songs really do serve a purpose! The songs tell us how to write a word! You would be surprised how many children don’t realize that, LOL!
I have my kids write the words while the sight words songs play, and then let the word disappear and have them try to remember it and write it from memory. Once they figure out that they can use the song to help themselves remember, they are off and running! This also boosts their knowledge of the alphabet as they USE what they have learned!
I hope that this was helpful to you! Happy teaching!
-Heidi
----------------------------------
Follow me! Did you enjoy this post? Do me a favor and share it with your friends! And follow this blog by signing up for my email updates here, or follow on Bloglovin', or follow me on TPT! I'm also on Pinterest, Facebook, Twitter, Instagram, Google+ and YouTube, too! Don't forget to sign up for our email newsletter for special deals and promo codes that you won't find out about anywhere else.