Teaching Kindergarten: What's Working? Week #8
Welcome to week 8! Today I am sharing a fun Halloween themed game, how I am keeping my class motivated, how to teach your class to write sentences, and a great game for practicing CVC words.

Here we go!
1. Halloween Boo! Game

There is another game that I came up with years ago, but never could give away nor sell, since I didn’t own the artwork on it. But, this summer I tried to catch up on the missing pieces of artwork on some of these “old reliable” games that I have been using year after year to make drill and practice a little bit more fun, and I actually did manage to get it all completed! I also just added some cards to this game that are like the whole group comparing sets cards, but with a Halloween theme, so this will also provide further reinforcement on comparing sets. Basically, you can play this game with either the sight word cards, the alphabet cards, or the numbers and comparing sets cards, so there is a lot of flexibility built into it. There is also a set of blank cards so that you can put your own words or concepts into it and make it suit your own needs as well. I have the whole game posted to my website for purchase HERE, if you're interested.
This is how you play “Boo!” It’s a lot like “Ring the Bell,” but with a Halloween theme.
1. The dealer holds all the cards, shuffling them before beginning. Put one “Boo!” card on the bottom of the stack.
2. The dealer gives the first child a card. He tries to identify the card. There is no penalty for getting it wrong.
3. If the child receives a special picture card, then he must do the following things.
Bat: The child gets to pretend to fly around the table one time.
Spider: The child gets to stand and spin around several times (a reference to a spider spinning a web.)
Ghost: The child says “Boo!” and he gets all the cards at the table, except for the dealer’s cards.
Pumpkin: The child gets to get up and do a log roll on the ground (the child lays down and rolls on the ground with his arms at his sides, like a pumpkin rolling down a hill.)
Monster: The child gets to get up and scares everyone at the table with a big monster “Roar!” Then all of the children at the table have to give him one of their cards.
Trick or Treat!: The child get either gets a small treat (like one piece of cereal)
The game continues until all of the cards are dealt. The child with the most cards is the winner.
Variations on the game:
1. Keep the special picture cards in one stack and the question cards in another stack. Start pulling the special cards when the kids are getting restless, and do them all at once so that everyone gets one.
2. When a child gets a special card, have him or her choose a friend or two to do the activity with him. Or, you choose some kids that were being really good to do it with him or her instead. That keeps everyone active.
3. Add some question cards that are harder for those children that are more advanced, so that the game remains at a good instructional level for all. You can even have two or more completely separate decks of cards at different levels that you play with different ability groups if you choose. The great thing about differentiating this way is that the children don’t know that they are being given different lessons, and no one has to feel bad about anything. From the outside looking in, it looks exactly the same, so it can just be your little secret. :)
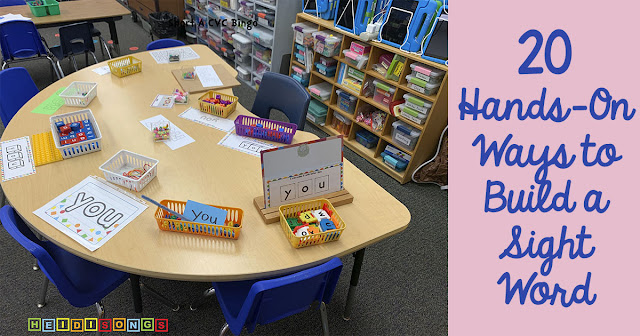
2. Practicing Sound Blending with CVC Bingo

I discovered a fun way to practice blending sounds a couple of years ago, probably sometime in the middle of the night! (I love the good ideas, I just wish they would come at a more convenient time of day!) It makes use of the CVC bingo games that are included in the CVC Resource CD and downloads, (and I'm including the Short A family Bingo game as a free download this week!) I figured that if I just changed the way the caller called out the word and segment it rather than say the whole word, then the kids could practice blending the sounds that they hear and look for that picture. For example, instead of calling out “cat,” the caller would say each sound individually: “/c/ /a/ /t/.” Then, the children would look for the picture of the cat and cover it up, etc. My kids learned to blend these sounds together really quickly this way! In fact, for the first few units of CVC words that we did, I had my parent volunteer segment the sounds of the pictures the first time they played the game, because this helped them learn to sound out the words in print the following week. It also is a more reasonable way for my struggling students to play the CVC bingo game, because it kind of brings it down to a more appropriate instructional level, and was definitely a more meaningful activity for those groups. If you don’t have the CVC bingo games, you could use any bingo game that you have with pictures, and simply segment the sounds, or separate the beginning sound from the rest of the picture and have them blend the word together and say the word. For example, instead of “desk,” it would be “/d/ /esk/” and then the kids would say, “desk.” Essentially, what you are doing here is taking a reading or vocabulary activity and turning it into a phonemic awareness activity. The phonemic awareness activity acts as a springboard to help the kids learn how to blend the sounds that they will eventually see in print, especially when you practice with words that they will be learning to read anyway! This is my “secret weapon” when I am trying to get my class to learn how to sound out CVC words, and I try to explain to parents how to help with this to at parent conferences and Back to School night. Then I include it as homework, and have their book buddies practice with them, too! Last year, nearly every single child in my class passed our CVC word reading test with 100%!
3. Getting Kindergartners Started Writing Sentences When it Seems IMPOSSIBLE!
Years ago, when I first started making up sight word songs, I developed this method of using the songs with the word wall to get kids started writing sentences. This method is more about teaching kids to write a specific sentence, rather than one of their own choosing as they would if they were journaling, but at least it’s a start! Later in the year when they have more skills, we move into journaling, and teaching kids to write the words that they hear. It seems to be particularly difficult for English language learners to try to write words phonetically right from the beginning, and this method gives these children especially a different way to go about it.

To prepare for the lesson, I make sure that my word wall has all of the words on it that the kids will need. (I always add the words to the wall gradually as the children learn them, rather than fill it up with all of them at the beginning of the year, which is overwhelming to the young eye when they are trying to find a new word.)
This is what I do:
A. Tell the children what sentence we are going to try to write. In my class I let them personalize their sentence by choosing what animal or object they would like to put at the end of it. For example, I tell them that we are going to write, ““I see the cow,” but they might like to write, “I see the pig,” instead. In this case, they could choose any farm animal. Actually, if a child takes the initiative to put something else on their paper rather than a farm animal, I’m fine with that, too!

B. Ask the children to repeat the sentence, and maybe count the words that you are going to write. Sometimes, I may write a line on my white board easel for each word that we are going to write. Then I choose a child to find that word on my word wall. The rest of the class “helps” that child by singing that sight word song while the child tries to find it and point at it with my teacher pointer. They do this a cappella, meaning that we are not using a CD; we just do it from memory. Once that child has found it, I have the children tell me how to spell the word. I show them how I can copy that word from the wall, or even write it from memory by using the song, if I can. I write the word on my white board easel.
C. I discuss the fact that I must have a space between my words, and I sing the “Spaces” song from Sing and Spell Vol. 2 with the kids a cappella. I put a magnet up on my white board easel to hold that space.
D. I ask the children what the next word should be, and pick another child to find that word with my pointer while the class again sings that sight word song. Then I write the word as the class spells it for me. Then we add the space with the Spaces song. Basically, I model this process from beginning to end, showing the children how I know what to write. I keep doing this until I get to the end of the sentence.
E. The child that gets picked to point to the last word in the sentence gets to choose the farm animal that I will put in my sentence. I have my farm animal pictures and the names of the animals to copy on a separate pocket chart from my word wall. I prefer to put them on a pocket chart rather than “clutter” up my word wall, which makes it hard for some of the little ones to find those sight words. Plus, there isn’t room to leave them up all year long on my word wall, so they will have to come down when we are done with the farm unit anyway.
F. When we get to the end of the sentence, I ask the children what we have to put at the end of the sentence, and then prompt them to sing me the I’m Done song from Sing and Spell Vol. 1. Then I put a period at the end. Later in the year, I explain that an exclamation point is a “happy period” that you can put there instead, and we practice reading the sentences that we wrote in two different ways: once with a period, and once with a “happy period.” It’s fun!
I have a little video clip of this method that I took of my class several years ago when I was trying to make an instructional DVD. The instructional DVD never happened, since the quality of the video tape didn’t come out as it should have, but I have used the video clip in my workshops ever since! I am including it here so that you can get an idea of what teaching kids to write this way looks like. If a picture tells a thousand words, than a video tells a million!
This year, I did this lesson once with the kids just watching, and then the second and third time I passed out white boards and had the kids write along with me on them. The fourth time I did it, I had them write their sentences in small groups as part of our rotation. (For more information on how I do my rotation, see my blog entry on how to pull small groups in Kindergarten.) I use lined writing paper that I made myself rather than that awful thin newsprint that the school provides, because the children just can’t erase it without making giant holes in the paper. So I xerox a bunch of copies of it each month and just use it as needed. I have three different versions of this paper, some with more lines and some with fewer, and I have included them as a free download this week. I know that many of you might not need them, and there’s not much to them, but I find them absolutely essential and use them every week, so maybe they will be useful to some of you as well.
To differentiate this lesson, I have my faster learners/workers write more than one sentence as time permits, and/or possibly include the word “and” and include more than one farm animal. They could also write an adjective before the animal, such as “I see the soft sheep,” and sound out the adjective that they want to include. For my struggling students, at the beginning of the year, they usually need me to guide their group through the process again from beginning to end. So I choose a student from just that group to find the first word, and then I make sure that everyone in the group was able to copy it. Then we go on from there, just as in the whole group lesson, but I stop each time and make sure that each child is keeping up with each word.
4. Using a BALL to Motivate a Reading Group

I found a rather unusual way to motivate a difficult group of children a couple of years ago, and I have used it ever since! I had been on little trip with my husband and had spotted an interesting looking squishy ball that interested me in a candy shop (don’t ask me why we were in the candy shop!) and on a whim I decided to buy it. It wound up on my desk at school when we came back. Well, the next day back at work, I was trying to give a required and very dry scripted guided reading lesson off of a chart to a group of very wiggly little boys that clearly couldn’t see the point of learning to read. I just COULDN’T get their attention! I had given lots of these lessons previously with puppets, but they were already tired of “Mr. Beaver” and “Mr. Pirate” asking them to sit up and read. One of them reached over to my desk and grabbed the ball. That’s when it hit me: offer them a chance to play with the ball in exchange for paying attention to the reading lesson! So I tried it. I had one little boy who was trying his best, so I took the ball from the little guy that had helped himself to it without permission and said, “I’m going to throw this nice new ball to A____ because he is doing SUCH a wonderful job of reading and trying his BEST!” I took the ball and tossed it to him, and let him play with it in his chair for 10 or 15 seconds. Then I invited him to throw it back to me. Guess what? I instantly had ALL of those boys’ attention, and they were ALL trying to read from the chart, in nice big voices as they sat up straight and tall. WOW! I couldn’t believe my luck! After we finished reading the chart, I passed the ball to each of them and let them each play with it for a few seconds, and then grabbed an empty tub, and asked each child to see if they could make a basket. They loved it, and worked for it every single day! So I decided that I could save some time by having more than one ball. I bought them when I found them on sale here and there, and at the Dollar store. Now I have a box full of them, and the box sits next to my reading table. The kids know that the balls are there, and if they are REALLY good and try their best, they might get to play with them for a little bit!
Since I have added more than one ball, I have learned to:
A. Model the acceptable behavior with a ball. It can’t be thrown high in the air, or at anyone. They also can’t get up and walk around with it.
B. Sometimes I use a sand timer to make sure that I don’t waste more than 60 seconds on it. But this is 60 seconds well spent, if they are all paying attention to the entire reading lesson, rather than picking at the glue on their fingers or staring at the wall for entertainment.
C. When I count to three, the ball must be thrown back into the box immediately. If they do not, then next time I pass around the balls, the child who did not follow directions doesn’t get one.
D. ONLY the children who are doing their best and paying attention get thrown a ball, and consistency is a must, or the balls will cease to work their magic. You can’t just decide that you feel sorry for a child that didn’t earn it and give it to him or her anyway, or you might as just well put them away. I tell the kids that I need to see their eyes on the chart or book, their lips moving, and I need to hear their voices, or they don’t get a ball. I do remind that the balls are coming and they might not get one if needed during the lesson. I have had some pretty “tough” boys in tears because they didn’t get a ball, which is hard to watch, but the next time around they usually do pay attention and try.
And since we are thinking outside of the box here, it may be good to mention that balls are not the only thing that will work! I have other “gadgets” that I keep near my reading table as well, and I use them in the same way. Usually, when I get to the end of a section in that scripted reading guide that we use, I give them the gadgets to play with while I look at the next section coming and figure out what it is that I am supposed to do and say next. It’s motivating and fun for the kids, and necessary for me. So far, my collection includes stretchy animals such as snakes and caterpillars, wind up toys, and a box full of magnets. And then there is also Mr. Ball. Mr. Ball is just a tennis ball that is sliced open halfway and that has wiggly eyes glued on. The children love to feed “Mr. Ball” a penny, and if they are good, I might give them a penny to do just that! When I squeeze him in just the right way, you can put a chip or a penny in his mouth. Sometimes Mr. Ball bites when you feed him though, so watch out! Then he gets too full and spits them up into the penny container. That’s always good for a laugh! And I think that there should always be a little bit of laughter in any school day. Don’t you?
----------------------------------
Follow me! Did you enjoy this post? Do me a favor and share it with your friends! And follow this blog by signing up for my email updates here, or follow on Bloglovin', or follow me on TPT! I'm also on Pinterest, Facebook, Twitter, Instagram, Google+ and YouTube, too! Don't forget to sign up for our email newsletter for special deals and promo codes that you won't find out about anywhere else.