Middle Sound Cups! How to Teach Kids to Find the Middle Sound of a Word
Have you heard the news? We've Moved to HeidiSongs.tv!
Our new website features an online video streaming service, updated blog posts at Heidisongs.blog, and a wealth of fresh resources designed to make learning even more fun and engaging.
You can also continue shopping for our educational products there and at our Teachers Pay Teachers store!
Head over to HeidiSongs.tv now and explore all the exciting new features.
See you there!
__________________________________________________________________________
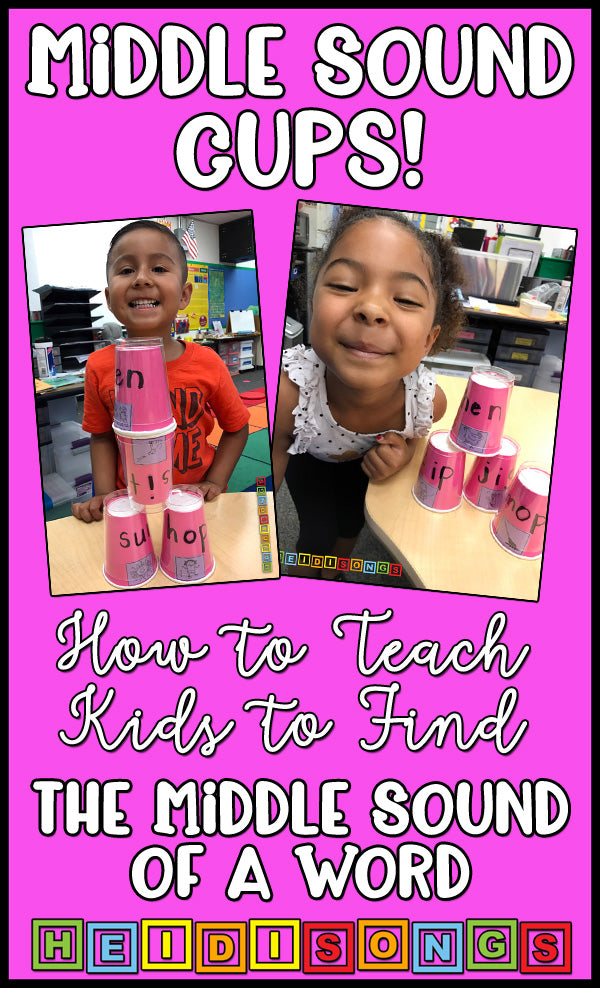
Today I am going to tell you about an idea I came up with a few years ago called CVC Cups! They help kids practice finding the middle sounds of CVC words. My kids really like this activity, and I hope that yours will, too! :)
To prepare this activity, you will need to find some clear cups and some solid colored cups. Both cups must be about the same size so that they fit together well as shown in the photo. Finding the cups is really the hardest part of the prep work, I think! I had to buy several different brands of cups before I found some that fit together well. Hopefully, you can benefit from my mistakes and just get the same brands that I did, and save yourself a little money!

I got my colored cups from the Party City store in my town, and then found them at this link. They are $2.99 for 20 cups. Naturally, I found them at my local dollar store in their party section shortly after that! The clear cups also came from Party City, but you can get them at this link here. Of course, there will be a shipping charge, so maybe you'll do better if you can find them at a store near your home. Target.com has the nine ounce cups at this link and the clear 12 ounce cups at this link, but you would have to check and see if your local store carries them. If not, just have it shipped to the store! The hard part is that you can only guess at which cups will stack together nicely until you get them out of the package. I think I bought three or four different kinds of cups before I finally found the ones that would work!

One disadvantage of the clear cups that I found is that they are not flexible, and some of them have already cracked, so if you go with this brand, you will probably want to have a few extras on hand to replace the ones that break. If anyone finds some cups that fit together nicely, but include some clear cups that are more flexible and don't crack so easily, please let me know! The Solo brand cups seem better, but these cups tend to be so BIG that I really didn't want to have to store such large items.

The other thing that you will need is some flash cards from the HeidiSongs CVC book, Volume One, Volume Two, or from some other source. I made two volumes of CVC books so that I could cover just about every word family you could wish for!

I used a few of the student flash cards from each of the short vowel units in the first volume of the CVC Book, which follows our (very old!) Houghton-Mifflin reading series closely. The flash cards are already quite small because they are designed for the children to practice reading and matching them up to the correct words at home with just one "click" on the xerox machine.

To make the cups:
1. Copy the flash cards that you need and cut them out.
2. Tape the flash cards down to the bottom of the solid color cups.
3. Get a permanent marker and write the first and last letter of each word on the cups, leaving space for the middle letter. Be careful not to write the letters so large that you cannot see all three of them head on. (You don't want the children to have to turn the cups to see all three letters.)
4. Don't try to write the middle letter on the clear cup until you have placed it on top of the solid color cup. This will help you write the letter in the right place. (Yes, I ruined a few cups before I figured out this rather obvious step! Oh, well!)
If you would like to try a free download to make a set of these cups, please visit the free download page of our website here and scroll down to "CVC 'at' Word Family Flashcards." :)
Now for the hard part: Teaching Kids to Find the Middle Sound of a Word
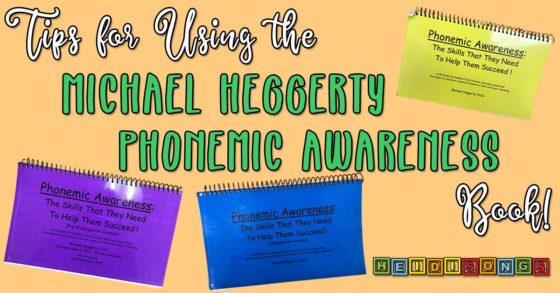
We have been using the Michael Heggerty Phonemic Awareness books at our school for the last couple of years, and there is one routine in his book for finding middle sounds that I have found to be particularly effective! It's called the "Roller Coaster."

I actually got to meet Micheal Heggerty at the Illinois ASCD Kinder Conference last month!!! What a thrill!
To do this, all you have to do is have the children stand or sit while they practice segmenting some words. In his book, the children practice segmenting about ten words per day. The daily practice makes all of the difference in the world! It only takes about a minute. When you combine it with the rest of the activities in his book, it takes about ten to fifteen minutes per day, if you are going slowly. And if it is takes me fifteen minutes, then you I'm probably going too slowly, or my class is not cooperating very well that day!

This is what Michael Heggerty's book looks like. You can download a couple of sample pages on his website to get an idea of the daily routine.
To do "The Roller Coaster," you have them raise one hand up to about shoulder height to get ready. I say, "Everybody, put your hand up!" and then check to make sure that they are all with me, because non-participation is NOT an option! If anyone is not participating, I call on them and tell them that I am waiting, and explain that we can do it together alone during playtime if they prefer. That solves the problem!
Once you have gotten past any non-participation problems, here are the steps to teach kids to find the middle sound:
1. Call out a word. Together, we all say the beginning sound of the word with our hand in the ready position.
2. We all say the middle sound, stretching it out as we raise our hand over our heads, going over the top of the roller coaster as pictured.
3. Then we all say the ending sound as we bring our hands down as pictured.
4. Say, "Middle sound?" And the kids tell me the vowel sound that they stretched out at the top of the roller coaster. (Don't forget to use the words, "middle sound" so that they will start to remember this important academic vocabulary for testing time!)

Once the children get into this routine, I think that you'll find that testing children orally on finding the middle sound of a word is an absolute breeze! On the morning of the test, I explained that I would be asking for the middle sound, or "the sound at the top of the roller coaster." Then I showed them with my hand and demonstrated what I meant. I don't have the exact percentages with me right now on how many kids got it right, but I'm guessing that about 90% of my 28 kids got 100% of them correct!
If you try this out, let me know! Hope it works well for you and your class!! Here are some more pictures of my cuties!
- Heidi :)
And if you're looking for some Phonics or Word Family Sound Blending songs, check out my website!!!

----------------------------------
Follow me! Did you enjoy this post? Do me a favor and share it with your friends! And follow this blog by signing up for my email updates here, or follow on Bloglovin', or follow me on TPT! I'm also on Pinterest, Facebook, Twitter, Instagram, Google+ and YouTube, too! Don't forget to sign up for our email newsletter for special deals and promo codes that you won't find out about anywhere else.
To prepare this activity, you will need to find some clear cups and some solid colored cups. Both cups must be about the same size so that they fit together well as shown in the photo. Finding the cups is really the hardest part of the prep work, I think! I had to buy several different brands of cups before I found some that fit together well. Hopefully, you can benefit from my mistakes and just get the same brands that I did, and save yourself a little money!

I got my colored cups from the Party City store in my town, and then found them at this link. They are $2.99 for 20 cups. Naturally, I found them at my local dollar store in their party section shortly after that! The clear cups also came from Party City, but you can get them at this link here. Of course, there will be a shipping charge, so maybe you'll do better if you can find them at a store near your home. Target.com has the nine ounce cups at this link and the clear 12 ounce cups at this link, but you would have to check and see if your local store carries them. If not, just have it shipped to the store! The hard part is that you can only guess at which cups will stack together nicely until you get them out of the package. I think I bought three or four different kinds of cups before I finally found the ones that would work!

One disadvantage of the clear cups that I found is that they are not flexible, and some of them have already cracked, so if you go with this brand, you will probably want to have a few extras on hand to replace the ones that break. If anyone finds some cups that fit together nicely, but include some clear cups that are more flexible and don't crack so easily, please let me know! The Solo brand cups seem better, but these cups tend to be so BIG that I really didn't want to have to store such large items.

The other thing that you will need is some flash cards from the HeidiSongs CVC book, Volume One, Volume Two, or from some other source. I made two volumes of CVC books so that I could cover just about every word family you could wish for!

I used a few of the student flash cards from each of the short vowel units in the first volume of the CVC Book, which follows our (very old!) Houghton-Mifflin reading series closely. The flash cards are already quite small because they are designed for the children to practice reading and matching them up to the correct words at home with just one "click" on the xerox machine.

To make the cups:
1. Copy the flash cards that you need and cut them out.
2. Tape the flash cards down to the bottom of the solid color cups.
3. Get a permanent marker and write the first and last letter of each word on the cups, leaving space for the middle letter. Be careful not to write the letters so large that you cannot see all three of them head on. (You don't want the children to have to turn the cups to see all three letters.)
4. Don't try to write the middle letter on the clear cup until you have placed it on top of the solid color cup. This will help you write the letter in the right place. (Yes, I ruined a few cups before I figured out this rather obvious step! Oh, well!)
If you would like to try a free download to make a set of these cups, please visit the free download page of our website here and scroll down to "CVC 'at' Word Family Flashcards." :)
Now for the hard part: Teaching Kids to Find the Middle Sound of a Word
We have been using the Michael Heggerty Phonemic Awareness books at our school for the last couple of years, and there is one routine in his book for finding middle sounds that I have found to be particularly effective! It's called the "Roller Coaster."

To do this, all you have to do is have the children stand or sit while they practice segmenting some words. In his book, the children practice segmenting about ten words per day. The daily practice makes all of the difference in the world! It only takes about a minute. When you combine it with the rest of the activities in his book, it takes about ten to fifteen minutes per day, if you are going slowly. And if it is takes me fifteen minutes, then you I'm probably going too slowly, or my class is not cooperating very well that day!

To do "The Roller Coaster," you have them raise one hand up to about shoulder height to get ready. I say, "Everybody, put your hand up!" and then check to make sure that they are all with me, because non-participation is NOT an option! If anyone is not participating, I call on them and tell them that I am waiting, and explain that we can do it together alone during playtime if they prefer. That solves the problem!
Once you have gotten past any non-participation problems, here are the steps to teach kids to find the middle sound:
1. Call out a word. Together, we all say the beginning sound of the word with our hand in the ready position.
2. We all say the middle sound, stretching it out as we raise our hand over our heads, going over the top of the roller coaster as pictured.
3. Then we all say the ending sound as we bring our hands down as pictured.
4. Say, "Middle sound?" And the kids tell me the vowel sound that they stretched out at the top of the roller coaster. (Don't forget to use the words, "middle sound" so that they will start to remember this important academic vocabulary for testing time!)

Once the children get into this routine, I think that you'll find that testing children orally on finding the middle sound of a word is an absolute breeze! On the morning of the test, I explained that I would be asking for the middle sound, or "the sound at the top of the roller coaster." Then I showed them with my hand and demonstrated what I meant. I don't have the exact percentages with me right now on how many kids got it right, but I'm guessing that about 90% of my 28 kids got 100% of them correct!
If you try this out, let me know! Hope it works well for you and your class!! Here are some more pictures of my cuties!
- Heidi :)
And if you're looking for some Phonics or Word Family Sound Blending songs, check out my website!!!

----------------------------------
Follow me! Did you enjoy this post? Do me a favor and share it with your friends! And follow this blog by signing up for my email updates here, or follow on Bloglovin', or follow me on TPT! I'm also on Pinterest, Facebook, Twitter, Instagram, Google+ and YouTube, too! Don't forget to sign up for our email newsletter for special deals and promo codes that you won't find out about anywhere else.


